Trek Safety Essentials: Weather, Gear, and First Aid on Nepal Trails

Complete guide: Nepal Trekking Safety and Health Guide

Direct answer: Safe trekking in Nepal is largely an equipment problem. Route planning, acclimatization schedules, insurance and evacuation procedures are covered in our complete Nepal trekking safety and health guide. This article stays on the gear itself: the layering system that controls your body temperature, the boots that carry you over scree and snow, the headlamp, the water treatment, the first aid kit and the communication equipment that matter when the weather turns or someone gets sick. Guides are not mandatory on most Nepal routes, but no trekker, independent or guided, should walk above 2,000 m without the essentials below. Weather remains the number one cause of disruptions and evacuations on Nepal trails, and the right equipment is what keeps a bad forecast from becoming a rescue.

Monsoon clouds over Himalayas
Annual monsoon climate patterns in Nepal. Photo: CC BY-SA 3.0 via Wikimedia Commons. (Illustrative only.)

Weather risks and what they demand from your kit

Weather complications are the number one cause of trek disruptions and evacuations in Nepal’s mountains, and each of the country’s four trekking seasons changes what belongs in your pack. Autumn (October to November) is the most stable window: clear skies, cold nights and busy trails. Winter (December to February) pushes the snowline below 3,000 m and closes many high lodges. Spring (March to May) brings warm days but hazy views, and the monsoon (June to August) makes lower trails slippery, feeds landslides on road sections and regularly hides the range in cloud.

The practical consequence is a huge temperature range. A spring afternoon in a valley can feel like 25°C while the same night above 4,000 m falls below -10°C, and wind chill on an exposed ridge can make a mild morning feel like winter within minutes. Pack for the coldest realistic night, not the average afternoon. Our best time to visit Nepal guide breaks down conditions month by month, and the official Nepal Tourism Board portal publishes seasonal advice.

Before every trek, get a real forecast rather than a rule of thumb. Elevation specific services such as Mountain Forecast cover individual peaks, teahouse owners know what is arriving over the next ridge, and good guides adjust plans daily. If heavy snow or a monsoon depression is forecast, change your plan. Patience and flexibility are the virtues of every seasoned trekker, especially during monsoon.

The layering system explained

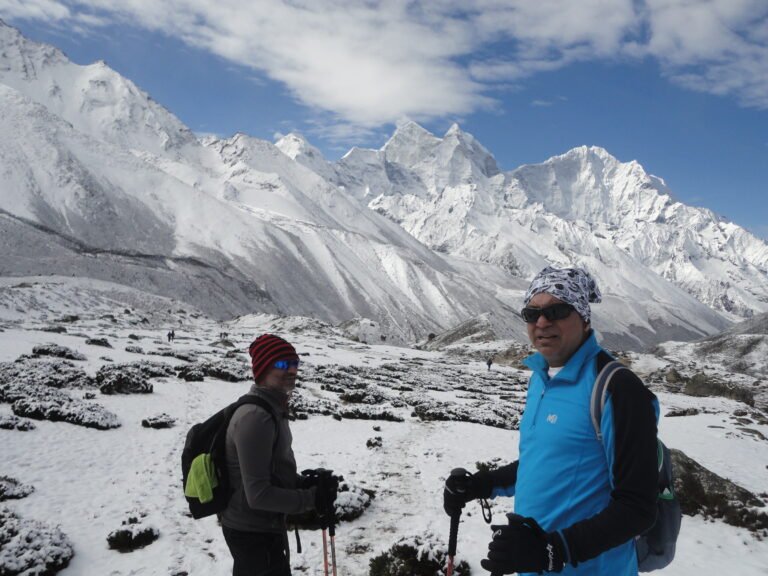
Clothing on a Nepal trek works as a three part system, and each layer has one job. The base layer moves sweat off your skin: pack two long sleeve merino or synthetic tops so one dries overnight while you wear the other. Avoid cotton entirely; it holds moisture and loses all insulation value when wet, which is how mild hypothermia cases begin. The mid layer is insulation: a midweight fleece for moving and a down jacket for rest stops, villages and evening meals. The outer layer is protection: a hooded waterproof breathable jacket and rain pants, carried even in the driest autumn because mountain storms build within minutes.

The skill is in how you use the system: strip a layer before you sweat through it, and add a layer before you shiver at a lunch stop. A damp base layer plus wind is the classic recipe for hypothermia above 3,000 m, and most cases start at rest, not on the move. For the complete item by item checklist, see our Nepal trekking packing list for 2026.

Packing the right gear

All trekkers, regardless of budget or experience level, should carry a safety focused kit that works when conditions turn. These are the items that matter:

  • Headlamp with spare batteries: pre-dawn starts, evening power cuts and windowless lodge corridors catch trekkers out; lithium cells handle cold better than alkaline.
  • Insulated waterproof shell: a hooded jacket and rain pants stop wind chill, which can drop the felt temperature by 20°C in minutes on exposed ridges.
  • Layered clothing: base, mid and outer layers you can add or strip in minutes (see above).
  • Sleeping bag rated to -10°C: teahouse blankets are thin above 3,500 m; a liner adds warmth and hygiene.
  • Emergency blanket: foil blankets weigh grams and trap body heat during an unplanned stop.
  • First aid kit: personal medication plus trauma and altitude basics (full contents below).
  • Satellite communicator or trekker radio: for emergencies beyond cell coverage; rental units are easy to find in Kathmandu.
  • Trekking poles: they take a real share of the load off your knees on long stone descents.
  • Sunglasses with full UV protection and a sun hat: snow glare at altitude damages eyes within hours.
  • High energy snacks that will not freeze: nuts, chocolate and bars for summit mornings.
  • A 30 to 40 litre daypack plus a duffel: if you hire a porter, the duffel goes with them and you carry only what the day needs.

Boots: the most important item you will wear

More Nepal treks end early because of blisters and twisted ankles than because of storms. Choose boots with real ankle support and a stiff sole for endless stone steps, break them in with at least two weeks of walks before you fly, and never rent or borrow boots for a multi day trek; a hot spot that appears on day one becomes disabling by day three. Waterproof membranes keep feet dry through snow and slush but run warm, so pair them with two or three pairs of merino hiking socks and change into dry socks at every lodge. Pack spare laces and stick blister tape on hot spots before they become open wounds, not after.

Water treatment on the trail

Dehydration quietly drives headaches, fatigue and altitude symptoms, so plan for three to four litres a day above 3,000 m. Teahouses sell boiled water for roughly NPR 50 to 150 per litre, which is the simplest option. For independence, carry a hollow fiber filter (fast, cheap per litre and good for thousands of litres) backed up by chlorine dioxide tablets, which weigh nothing and also treat viruses. UV pens work but eat batteries in the cold. Skip single use plastic bottles: they cost a fortune higher up the trail and Nepal has enough trail plastic already. Add oral rehydration salts for days when illness or heat drains you.

First aid and emergencies

Most trekkers complete their routes without incident, but altitude illness is a silent threat that can escalate within hours, and the nearest pharmacy may be two days away. A personal first aid kit for Nepal should include:

  • Acetazolamide (Diamox) for altitude prevention and treatment. A common adult scheme is 125 mg twice daily, but confirm the dose with your doctor before travelling and learn the symptoms and descent rules in our altitude sickness guide for Nepal trekkers.
  • Pain relief: ibuprofen for altitude headaches plus paracetamol.
  • Stomach medication: loperamide for diarrhoea and oral rehydration salts.
  • Wound care: antiseptic wipes, gauze, medical tape and an elastic bandage for sprains.
  • Blister kit: Compeed patches or moleskin, applied early.
  • Tools: tweezers, small scissors, a thermometer and personal prescriptions with a copy of the script.

Wrap duct tape around your water bottle for field repairs. Carry the kit on your body, not in a porter’s duffel, and take a basic first aid course before a long trek; supplies are useless if nobody in the group knows how to use them. Evacuation protocols and the full illness playbook live in our complete trekking safety and health guide linked at the top of this page.

Light, power and communication

A headlamp belongs clipped to every pack, even for planned day walks: choose at least 200 lumens and carry lithium spares. Add a 10,000 to 20,000 mAh power bank, because lodges above 3,500 m often charge NPR 100 to 400 per hour, when they charge at all. Ncell and Nepal Telecom SIMs work surprisingly well on main trails but die in gorges, so remote trekkers should rent or bring a satellite messenger such as a Garmin inReach or Zoleo. Download offline maps before leaving wifi, carry a whistle as a backup signal, and share your full itinerary with at least two people before you start.

Renting versus buying gear in Nepal

You do not need to spend a fortune before your first trek. Kathmandu’s Thamel and Pokhara’s Lakeside are full of rental shops where down jackets, sleeping bags, poles and duffels rent for roughly USD 1 to 2 per item per day, which lands near USD 30 to 60 for a two week trek. Buy before you fly only what must fit you personally: boots, base layers and a headlamp. Inspect rental gear for working zips and clean liners, and know that shops selling famous brand jackets for USD 20 are usually selling convincing copies.

Item Rent per day Buy new (approx.)
Down jacket USD 1-2 USD 80-200
Sleeping bag (-10°C) USD 1-2 USD 100-250
Trekking poles (pair) USD 0.5-1 USD 30-100
Boots do not rent USD 80-200
Headlamp USD 0.5-1 USD 15-60

What teahouses provide, so you can pack less

Lodge treks mean you carry far less than on a camping trip: beds and blankets, boiled drinking water, basic food and paid charging are all provided along main routes. But blankets are rarely warm enough above 3,500 m, hot showers become rare above 3,000 m, and menu prices climb with altitude, so a sleeping bag, wet wipes and snacks still earn their place. Our teahouse trekking guide explains what to expect night by night, and our list of 10 common Nepal trekking mistakes shows which packing errors ruin the most trips.

Are guides mandatory?

Guides are not mandatory on most classic routes such as Everest Base Camp, Annapurna Circuit and Langtang, though permit rules keep changing, so check current requirements before booking. Guides still add real safety value: they read weather, arrange evacuation fast, carry group safety gear and speak the local language. Independent trekkers compensate by planning carefully and always leaving a written itinerary with two contacts. The planning side of that decision is covered in the complete safety and health guide linked above.

Trekking safety FAQ

What should I do if I get sick on the trail?
Stop ascending immediately. For altitude sickness, descent is the only real cure: drop 300 to 500 m and reassess, hydrate, use your painkillers or Diamox as planned, and call your insurance helpline if symptoms worsen. Never climb higher with a headache that will not lift.

Should I buy special gear or rent it?
Buy boots and base layers; rent bulky items like down jackets and sleeping bags unless you trek often. The one thing never to rent is footwear.

How much water should I drink at altitude?
Three to four litres per day above 3,000 m. Dehydration headaches mimic altitude sickness, so make water treatment easy and drink before you are thirsty.

Do I really need a headlamp if I never hike at night?
Yes. Trail days run long, starts are pre-dawn, and mountain power cuts happen. It is the cheapest insurance in your pack.

Key takeaways

  • Weather is the biggest safety variable in Nepal: check elevation specific forecasts and be ready to change plans.
  • Build your kit around the layering system, solid boots and a real first aid pack rather than gadgets.
  • Treat your own water and carry enough capacity; dehydration drives most trail headaches.
  • Carry light, power and communication that work when the grid does not.
  • Share your itinerary with at least two people before you leave, and turn back when the risk grows. No trek is worth your life.

Safety is not optional; it is the foundation of every great trek.

Related guides

Share this content:

Similar Posts

Leave a Reply

Your email address will not be published. Required fields are marked *